Tuesday, November 3, 2020

SQL Server Services are not visible in the SQL Server configuration manager.

The Curious Case of missing SQL Server Services in the SQL Server Configuration Manager.

Issue: Services are not visible in SQL Server configuration manager.


We received a mail stating that the application is completely down and they are seeing SQL Server related errors in the logs. When I connected to the database server noticed services are not visible in the SQL Server configuration manager. Yes, there are no SQL Server services in the SQL Server configuration manager. My first impression, someone worked really hard!!


services missing

When I couldn’t see the SQL Server services in SQL Server Configuration manager the next place I verified is services.msc. When I opened services.msc, I can see SQL Server services there at least, but when I tried starting the services it failed with the below error:


Application popup: SQL Server: Your SQL Server installation is either corrupt or has been tampered with (Could not open default language SQLEVN70 resource file).   Please uninstall then re-run setup to correct this problem


As the error indicates the installation is either corrupt or there is a missing resource file. When I searched for the “SQLEVN70” resource file, I found it in the server. When I verified the event logs noticed messages related to windows updates failure. So next, I verified “View Installed Updates” under Control Panel -> Programs -> Programs and Features -> Installed Updates (sample screenshot of the location below)


check installed updates


and noticed 2 SQL Server updates that got installed recently. One is Hotfix 5830 and the other is SQL Server 2016 SP2 CU14. Looks like while these patches are getting installed the installation process got interrupted due to some reason and the installation failed. This has resulted in the issue.


Below are the troubleshooting steps I followed for fixing my issue:


1.    I have uninstalled the hotfix 5830 first.

2.    I have uninstalled the CU14 hotfix.

3.    Performed SQL Server Instance repair.


Below are the details on how I did each of the steps:

First uninstalling the hotfix 5830. To Uninstall, right-click on the already installed updates (which can be found here: Control Panel -> Programs -> Programs and Features -> Installed Updates) and click on ‘Uninstall’ and proceed.

uninstall windows updates


Select the components from which you want to uninstall the hotfix or CU. Please note here I am selecting on 'Shared Features' but in the actual production server, we need to select all the components that are applicable like Database Engine and so on.
 
remove features

Click on 'Remove'

uninstall sql server patch


To Uninstall the CU14 from all the database components, follow the same above step i.e.., right-click on the CU14 update in ‘view installed updates’ and select uninstall. Once uninstallation completes restart the server again.

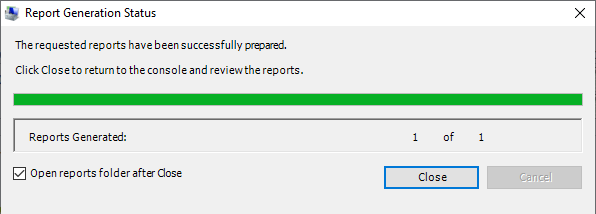
Now once the server comes up, copy the SQL Server 2016 setup files to any drive in the server and run the setup.exe. Once the window will open, select ‘Maintenance’ and select ‘Repair’, as shown below screenshot. Now select the instance that needs to be repaired and in my case, it is the default instance.

sql server instance repair

sql server instance repair


Press ‘Repair’ and the selected instance repair will start


sql server instance repair


Once the repair of the instance completed successfully I have refreshed the SQL Server Configuration Manager and I was able to see all the SQL services in the SQL Server configuration manager.

Now I have started the SQL Server services and everything started working as usual.

On searching online I found this issue of services disappearing from SQL Server configuration manager also happens if someone renames names in the registry if some dll or resource files are missing and so on.


If you have faced this issue share your experience on how you fixed it in the comments sections below.


Thanks VV!!


“The best friend you will ever find is you. Love yourself with joy and fill your heart with bliss and happiness.”

― Debasish Mridha


#MSSQL #SQL #SQLServer #database

Monday, August 24, 2020

Different Phases of Azure Database Migration and Tools that help during Azure Migrations.

A successful cloud migration project implementation will not only save budget but it will also result in smooth operations post-migration. It is critical to plan and implement migration strategies after a thorough study.


In this article, we will discuss different activities involved in each of the migration phases and different tools that can be used to perform these activities. Please note this article is written keeping in mind MSSQL On-Premise database migration to Azure so the methods and tools mentioned in this article will be helpful for database migrations. Few of the tools discussed in this article can be used for performing many other activities like monitoring, analysis, and so on but the other features of the tools are not discussed here.


An Azure migration project involves many number of tasks that needs to be performed such as the gathering of information, validation of source databases\servers, cost analysis and so on. Azure migration project activities can be mainly divided into 3 phases as mentioned below.


 1.   Pre-Migration Phase.

 2.   Migration Phase.

 3.   Post-Migration Phase.


1.   Pre-Migration Phase: 


This is the beginning phase of the Azure migration project and it is one of the important and strong pillars of a migration project. The successful execution of a migration project depends on how detailed and accurately this phase is executed. The main tasks of this phase are estimating the cost of Azure resources, gathering all details of the source servers that are required to be migrated, and to check if the source server/database can be migrated or not.


We can estimate the cost savings that can be achieved by migrating existing servers\databases to Azure, as discussed here.


The first task is to gather information about the source environment. For collecting information about source environment MAPToolkit is one of the free tools available. We have discussed in detail about this tool here. After gathering information about the source environment using MAPToolkit, the next step is to check if the existing source environment or the database(s) are ready to migrate to the cloud. As this article is written keeping MSSQL database migrations in mind, to assess the source databases we can use the DMA (Database Migration Assistant) tool. DMA is discussed in detail here. After assessing the source databases we will get details of which databases can be migrated and which can’t be migrated, which existing features of source environment are not in use in Azure, mainly we need to identify and fix the migration blockers in the DMA tool output. Migration blockers are the features or components that will block our Azure migration, these can be identified using the DMA tool. After fixing all the migration blockers only Azure migration can be performed successfully.


2.   Migration Phase:


In this phase, we will perform the actual migration of applications, servers, and databases. There are a number of methods and tools available for performing MSSQL database migration, in fact, there are various ways to migrate MSSQL database using SSMS itself. Based on the environment and customer specifications like the downtime allowed, the volume of data, budget, and so on,  the tools and methods of migration vary. There is no one fixed method of migration which suits for all environments and databases. There are different tools like DMS (Database Migration Service), DMA (Database Migration Assistant), Transactional Replication, and so on.


How we plan and perform a SQL Server Service Pack upgrade similarly once the type of migration and the tool for migration is finalized we first need to perform migrations of low-risk databases\environments like Test or Stage databases. Once we identify the challenges and fixes during the migration of test or stage databases then we need to plan for production database migration. Migrating less critical databases will give us a good estimate of how much time it takes to migrate, what are the challenges that may occur during migration, and which method would be best suitable for migrating the production database.


 3.   Post-Migration:


Once migration is completed the first step obviously is to validate the application. Once all validations are completed then the next step is to start tracking and monitoring the cloud environment.  


As one of the main advantages of moving to the cloud is to reduce cost, as we are billed 'Pay Per Usage', to take the full advantage of 'Pay Per Usage' we need to keep tracking our environment continuously and scale up and scale down cloud resources as needed. Continuous monitoring of the cloud environment helps in removing unused resources like unused storages,  unused snapshots, unused VMs, and so on. We should start collecting data points of the cloud environment using different tools available. After gathering multiple data points by monitoring the environment we can use those data points for optimizing and cost-saving in the environment.


Azure Monitor helps in monitoring and tracking of applications, infrastructure, and networks. The data gathered while monitoring can be used to perform several analysis and detecting problems. Log analytics can be used to perform in-depth troubleshooting and Applications Insight helps in working on application issues and dependencies. At the time of writing this article Log Analytics and Application Insights also falls under Azure Monitor. You can read in detail about Azure monitor here. 


Azure Security Center is a security management system that helps in assessing and alerting about security issues of our environment and resources. It helps in assessing the environment/workloads and gives us the current status of the security of our resources and provides suitable recommendations. You can read here in detail about AzureSecurity Centre.


Below picture shows different phases and steps involved in each phase of MSSQL database migration to Azure and different tools that will be helpful to perform different activities.


Stages of database migration to azure cloud


How to create an Azure SQL Database?

How to perform ONLINE migration of the database to Azure?

How to perform OFFLINE migration of the database to Azure?


Thanks VV!!


#Azuresql #Azuremigration #migration #SQLServer #Azure #MSSQL #Databasemigration #Database


Monday, July 13, 2020

How to collect information related to source servers before Azure migration?


While planning for a migration one of the important steps is to study and understand our existing source environment. We need to first understand whether our existing source environment is ready for migration or not, what issues we might face if we migrate, what dependencies we have between our servers and SQL instances\databases, what users permissions exist and so on. A careful study of our source environment helps in avoiding issues during migrations and even prevents issues that might occur after migration.

We already studied about DMA tool, this tool helps greatly in verifying and assessing the source databases and it will give us a detailed report of whether source databases are ready for migration or we need to fix any issues before migrating and so on. But we should remember DMA is not a tool for information collection.

Many clients manage inventory of the environments. For the people who are unaware of inventory, it is the collection of all the details of the environment like applications, servers, Hardware and Software details, database instances, database details, storage, and so on. Having an inventory helps in planning any migration activity smoothly because we will be well aware of our environment and we can plan the migration accordingly. This is true for any kind of migration not only cloud migrations. It is a time-consuming process to collect the information manually and consolidate it. Instead of collecting or fetching the information manually, we can use a tool called MAP Toolkit.

What is MAP Toolkit?

Microsoft Assessment and Planning Toolkit (MAP Toolkit) is a free Microsoft tool that can be used to collect, assess, and display the information gathered in report format automatically about our environment. This tool saves tons of time by fetching the information of all the servers in our environment automatically. We can use this tool to capture the performance metrics as well.

How to download MAP Toolkit?

It can be downloaded from here.

How to install Map Toolkit?

After downloading the exe from the above location, installing the application is quite straightforward and easy. Just double-clicking and clicking Next.

How to use MAP Toolkit?

After installing the tool click on the icon below:


Now once the tool will open the first step we need to perform is to give a name to our inventory database


Here I’m naming my database as “DB Inventory”


After naming the database, on the left side of the tool we can see different types of information we can fetch using the tool.


As mentioned earlier this tool is useful in fetching information about the entire environment but in this article, we will see how we can fetch information about SQL Server instances and databases within. So lets select ‘Database’ option from the left side of the tool


Next Click on the ‘collect inventory data’ option on the right side (highlighted in below screenshot) of the tool


Now the ‘Inventory and Assessment Wizard’ will open. Here we can select what different types of inventories we can collect. 


As we want to collect information specific to SQL Server, scroll down the list and select SQL Server and SQL Server with Database Details from the list.


Based on the scenarios we select above, the tool determines which different technologies should be used to collect different information. In the next window, we can select the ‘Discovery Methods’ like whether to use Active Directory, Windows networking protocols, and so on. As I’m running this on my local machine I will select the ‘Manually enter computer names and credentials’ option.


As we are aware we need some credentials to access servers, in the next windows we need to provide that credential information with which the tool can communicate with the servers in the network. We can choose different credentials for different technologies and if required we can validate the credentials using Domain controller.


Here I want to only one credential for all the technologies, so I’m mentioning as below


When we have multiple credentials in-place then in the next window we can prioritize the credentials for each technology like in which sequence credentials need to be used for each technology


In the next window, we need to specify the computer details for which we want to fetch the information and along with that, we can provide the credential to use.


Once we click on ‘create’, we can add the computer names and which credentials to use for the technologies. Here I’m using the same credentials.


Now in the summary window, we can see all the options we selected. Cross check and modify if any required.


After clicking on ‘Finish’ the tool will start collecting the requested information from the servers. We can see in the ‘Data Collection’ window which pops-up automatically.


Once data collection is completed, click on close


Now once we go back to MAP Toolkit we can see the tool has identified 2 instances of SQL Server in my machine and their version is SQL Server 2017. Click on ‘Total count’.


Now we can see more information about SQL Server components in my machine. Like what all SQL Server components have been detected in machine


What editions are available


Now scroll up and on right side top corner we can see two reports available as shown in the picture below


Once we click on the required report, a report will be generated and saved as shown below


Once we open the report we can see entire information about the SQL Server environment. These reports will have detailed information about the SQL instances like components of SQL, their configuration, settings, database details, user details and much more. Below are a few sample screenshots.


Similarly, we can use this tool in collecting information about our entire environment during the planning phase of the migration.


Thanks VV!!


The habit of procrastination fatigues you more than the effort it takes to do it. - Shiv Khera

 #Inventory #migration #AzureSQL #Azure #SQLServer #MSSQL  #MAPToolkit #planning #Azuremigration

Monday, July 6, 2020

How to choose the target Azure SQL platform while migrating on-premise SQL Server database?


As part of database migration to cloud one of the important decision to make is which target platform to choose. As discussed in the previous article there are multiple options to choose from the Azure SQL family while migrating our on-premise SQL Server.  

Below flowchart helps in choosing the target Azure SQL platform from a database perspective by evaluating scenarios like if we want to migrate a single database or multiple databases, if want to use only database scoped features or we want to use instance scoped features as well, if we have any other applications that we need to migrate along with the databases, if we want the control of underlying instance and OS.

Remember target platform selection should not be decided solely based on the below chart, because choosing a target platform should not be done only by evaluating database features and dependencies. We also need to take into account many other important factors like infrastructure, application compatibility, support requirements after migration, business needs, cost, and so on. 


Azure Target Platform Selection Chart:

This chart helps as a starting point in deciding which target platform in Azure suits to your existing on-premise environment.

Note: This chart gives you only a high-level idea of which target platform can be selected, but many many other parameters need to be considered before finalizing the target platform. Please evaluate all the parameters as per your environment and decide the target platform.


Thanks VV!!


#azure #databasemigration #azuremigration #sqlserver #sql #dbmigration #Azure #AzureSQL

Monday, June 29, 2020

Azure SQL Database vs Azure SQL Managed Instance vs SQL Server on Azure VMs.


While migrating on-premise SQL Server to Azure SQL platform we have 3 options to choose from Azure SQL family.


·         Azure SQL Database.

·         Azure SQL Managed Instance.

·         SQL Server on Azure VMs.


Depending on the requirement, each of these is best suited for different scenarios. 


Azure SQL Database:


Azure SQL Database option gives us a single database in the Azure cloud, which is similar to a SQL Server database. It supports all the features of the SQL Server database. With the Azure SQL Database option, we are responsible only to manage and optimize the database, the server and instance are managed by MS. We will get the latest stable version of SQL Server as Azure SQL Database. We can process both relational and non-relational data with this database. It falls under Platform as a Service (PaaS).


As we can see this option is best suited when we don’t want the overhead of maintaining and managing underlying instance and OS. Also at the same time, this option is best suited when we want to use only database scoped features. This option does not suit if we want to use instance level features like SQL Server Agent and so on. We need to use alternatives like Elastic jobs in-place of SQL Server jobs if we want to schedule any activities when we opt for Azure SQL Database.


Elastic Pools:


Elastic Pools is a collection of several Azure SQL Databases. This option is suited when we have applications relying on multiple databases with unpredictable usage demands. In short, when we have several databases with fluctuating loads instead of allocating resources to each single database and managing them we can add all those databases under a single pool and allocate resources to the entire pool. This helps hugely while managing the resources of all the databases in the pool. All the databases within the pool will share the resources of the pool and will use the resources whenever required. If we notice there is a resource crunch on the overall pool itself, we can allocate more resources to the pool as per the demand.


This option mainly helps in avoiding over and under allocation of resources than required along with providing all the Azure SQL Database advantages which in turn saves costs included.


Azure SQL Managed Instance:


Azure SQL Managed instance option is suited when we want to migrate our entire SQL Server instance to the Azure cloud. As we know with Azure SQL Database we can use all the database related features, with this managed instance option we can use instance level features along with database-level features. This option helps in doing a lift and shift migration to the cloud with minimal to no changes to the applications. With this option, we will not have the responsibility of managing and maintaining the underlying OS.


SQL Server on Azure VMs:


This option is suited when we want complete control of the environment like OS, SQL instance, and the databases. We will have to manage and maintain the entire infrastructure. We will be responsible for installing and configure SQL instances and creating / managing required databases, SQL jobs, HA features, and so on. With this option, we can lift and shift the applications and databases with minimal to no changes to the existing on-premise environment.

These features will give us flexibility in selecting and managing only the required features, like if we don’t want to use SQL Server Agent jobs then we can choose Azure SQL Database or if we don’t need to use linked server then we can use Azure SQL Database or Elastic pools or if we don’t want to manage the underlying OS but want to use SQL Server instance level features then we can choose SQL Manage instance or if we want to complete control of SQL Server instance and the underlying OS then we can choose SQL Server on Azure VMs and so on.

Depending on the requirements and budget, we can choose only required features which in turn helps in saving costs and will save the time of the support groups.


Below table outlines the comparison of all these options as of today:


Azure SQL Database vs Azure SQL Managed Instance vs SQL Server on Azure VMs


This is a high-level comparison of each of these options and there are many more differences in each of them. To know the differences between all the features and administration differences of each of them in detail refer below links.


Thanks VV!!


#azure #azuresqldatabase #azuresqlmanagedinstance #IaaS #PaaS #sqldatabase #cloudmigration #sql #elasticpools #Azure #AzureSQL

Friday, June 19, 2020

How to perform offline migration of a SQL Server database to Azure?

As discussed in the previous article Data Migration Assistant (DMA) is one of the tools which we can use to assess a database and it can also migrate the database. DMA is one of the tools for performing Offline database migrations. So before performing a production database migration using DMA we need to schedule sufficient maintenance windows and thorough testing in a lower environment. Here we will migrate an on-premise database named “AdventureWorks2016” to Azure SQL Database using DMA. Details of DMA and different migrations are discussed in this article..

I have already downloaded and created the “AdventureWorks2016” database. You can read this article to get details from where this database can be downloaded.

Download DMA:

We can download DMA for free from here.


Install DMA:

Installing DMA is quite easy just need to click on 'Next', 'Next' as shown below. 


Once installation completes successfully, we should see below shortcut on the desktop.


Assess A Database using DMA:

Here first, we will evaluate if my database is migrated from a SQL Server database to Azure SQL Database, what existing features might not work in Azure, what issues the database might face, and at the same time DMA will also suggest remedies for the issues identified.

Open DMA by double-clicking the icon. Now click on ‘+’ and create a new project as shown below


Enter the project name as “AssessDB”, assessment type as ‘Database Engine’. Select the desired source and target server. I am selecting the source server type as “SQL Server” and Target Server type as “Azure SQL Database” as shown below


As of today, we can assess if the source database will have any compatibility issues if migrated to azure, and also we can check if any of the existing features of the source database will have issues if migrated to azure. Let’s check both the options as shown below


Now connect to the source SQL instance using either Windows or SQL authentication:


Now select the database which we want to assess. Here we are assessing “AdventureWorks2016” database, so select it and click on 'Add':


Now Click on ‘Start Assessment’ and the assessment will start


Once the assessment is completed in the results we will have information about different issues we might face if we migrate the current database to azure. As you can see I already have some SQL Server jobs on source database hence the report is saying there are no SQL Server Agent jobs in Azure. So if these jobs are critical and required to be run after migration also we need to plan for a fix for this. Either we can select another target platform like SQL Managed Instance or SQL on Azure VM (Iaas) or use Elastic jobs. But in my case, this is just a test environment I will ignore the warnings and proceed.


Same way under ‘Compatibility Issues’ it says ‘Full-Text’ index has changed and so on.


So we need to review this Assessment report thoroughly and need to apply fixes for any issues identified or might need to exclude any of the objects\components from source, if we don’t need to use them in Azure and so on. We can save or export this report.

Migrate Database using DMA:

Once database assessment is completed next we can use DMA itself to migrate the database to Azure.


Now click on ‘+’ symbol again and create a new project named “MigrateDB”. Same as we did for assessing the database select the source and target servers. In the “Migration scope”, we can choose what we want to migrate either only data or only schema or both schema\data. Here we will migrate both the schema and data, so I am selecting the option ‘Schema and data’.


Now select the source server and authentication type either windows or SQL authentication


Then select the source database which we want to migrate. Here it is ‘AdventureWorks2016’ and click 'Next'


Connect to the target Azure server using SQL authentication.


Now select the target database to which we want to migrate the data and schema of our source server. I have already created an empty Azure SQL database named ‘AdventureWorks2016’ and I will migrate my source database to this. Read here to know how to create an empty Azure SQL database.


In ‘Select Objects’ page we can select what all objects we wish to migrate.


Also on the same ‘Select Objects’ page, we can view object-specific issues that might encounter after migration. Like in the below screenshot you can see ‘HumanResources.JobCandidate’ table has Full-Text index on a column and DMA suggests ‘we can migrate this object but might face issue related Full-Text’. So we can take necessary actions and alternatives as per suggestions provided by DMA. Then click on ‘Generate SQL script’.


In this page ‘Script & Deploy Schema’, first SQL script will be generated for all the objects selected on the previous page. 


Once the script is generated we can click on ‘Deploy Schema’ to start deployment of the schema.


Once schema deployment is completed we can either Redeploy the schema or start migrating the data. Click on ‘Migrate data’


In the ‘Select tables’ page, select the tables to migrate. Here we will migrate all the tables. After selecting tables click on ‘Start data migration’The migration process will start and we can view progress as below


Once entire migration is complete let's connect to the Azure database server using ADS(Azure Data Studio). Now we can see the schema and data from our source database has been migrated to my Azure SQL database ‘AdventureWorks2016’.


Once we verify and make sure the entire source database has been migrated completely to the Azure SQL database and after applying fixes if any on the Azure SQL database now the application connections need to be diverted from on-premise SQL database to Azure SQL database. After diverting the connections once thorough testing is done that marks the completion of the migration.


Note: Database Migration Service is one of the most widely used tools for performing both Offline\Online migrations.


Thanks VV!!


#azure #databasemigration #migration #database #sqlserver #sql #Azure #DMA #offlinemigration #dbmigration #AzureSQL