Monday, November 18, 2019

How to find what all features of SQL Server are installed in the server.


I received a query from one of my team member: Is there a way to find out what all components of SQL Server are installed in a server?

This is a useful information when we want to set up a new SQL instance similar to an existing instance. Below is how we can find out.

1.   Login to the server you want to find out what all SQL features are installed in it. In my case its TEST server.
2.   Open SQL Server Installation Center.


3.   In the installation center click on the ‘Tools’ tab and click on ‘Installed SQL Server features discovery report.’.


4.   It will open up a report like this.


Please add in comments in what other ways we can find out what all SQL features installed in a server.

Thanks VV!!


#sqlfeatures, #sqlserver, #featuresinstalled, #installed, #sql, #server #report

Friday, August 9, 2019

Please create a master key in the database or open the master key in the session before performing this operation. (Microsoft SQL Server, Error: 15581).


In one newly configured Integration Services Catalog instance while deploying a project through *.ispac file, the deployment failed at ‘Deploying project’ step as shown below and has thrown below error.


Below is the error received:


Please create a master key in the database or open the master key in the session before performing this operation. (Microsoft SQL Server, Error: 15581).


To fix this error we need to open the master key manually by using below command.


USE [SSISDB]
OPEN master Key decryption by password = 'Password'


But I was not able to run the above command due to a special character (which is a single code symbol ) in my master key password. So to overcome this error I have to change the password of the master key first.


How to change the password of the master key?

To change the password of the master key, use the below command as mentioned here. Make sure you run this on the SSISDB database if not it will throw an error.


USE DatabaseName;
ALTER MASTER KEY REGENERATE WITH ENCRYPTION BY PASSWORD = 'New_Password';
GO

Now I tried deploying the project again using the same *.ispac file and this time it completed successfully.

If you noticed I have tried deploying the project without opening the master key and it completed successfully so in my scenario the issue was with the special characters in the password so after changing the password the project deployment completed successfully.


Points to Note:

·        If you are receiving an error stating create a new master key or open the existing master key, then you need to open the master key manually with the command provided above.
·        If you want to change the password of the master key you can use ALTER MASTER KEY command as mentioned above.


Let me know is there any other way you fixed this issue in your environment in the comment section below.


Thanks VV!!


#SSISDB; #SQLServer; #SQL; #SSISCatalog #IntegrationServicesCatalog

Tuesday, July 16, 2019

How to remove log shipping when secondary server not available.


Recently I was working on a task to remove log shipping on one of the PRIMARY servers but it failed with below error. After checking realized that the secondary server was already decommissioned. So the log shipping components are not getting removed completely.

“SQL Server Management Studio Could not delete Log Shipping Configuration. Object reference not set to an instance of an object.”

To remove log shipping components from the PRIMARY server completely we first need to find on which databases log shipping is still enabled by using the below query:

Select primary_database FROM msdb..log_shipping_primary_databases;

Now run below 2 queries by replacing with server and database names to remove the log shipping components:


USE [master]

GO

EXEC sp_delete_log_shipping_primary_secondary @primary_database = '[Database_Name]', @secondary_server = '[Secondary_Server_Name]', @secondary_database = '[Database_Name]';

GO

EXEC sp_delete_log_shipping_primary_database @database = '[Database_Name]'


Thanks VV!!


Friday, February 8, 2019

Partitions in Cosmos DB.

As discussed in the previous article, a container can hold different types of items based on the type of API selected. These items of the container are further grouped into different subsets based on a partition key. So, the item’s of container gets partitioned into subsets based on a partition key and this helps in managing the performance of the container. Each item in a container will have a partition key and it determines to which logical partition the item belongs to. For example, let’s say a container having details of different departments of a company and each department has a DeptID. If there are 100 departments and if DeptID is selected as the partition key then there will be 100 different partitions in the container.

The data added to the container and the throughput provisioned on the container are distributed evenly across all the logical partitions of the container. As the data increases in the container, the logical partitions are created automatically. The maximum size of a logical partition is 10GB. The storage and throughput we select during the creation of the container affect the number of physical and logical partitions in a container.

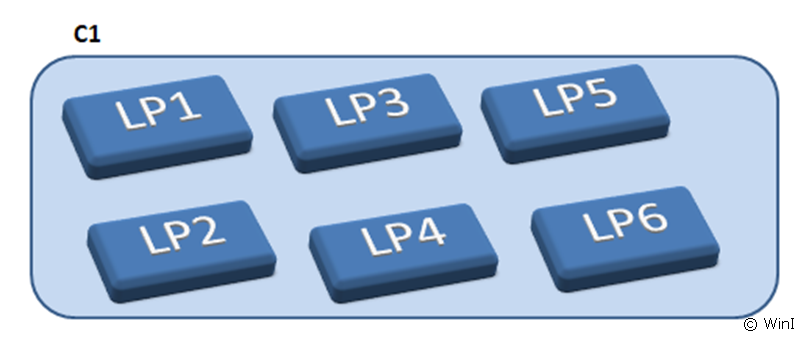
In the below pictorial example, C1 is the container and the data in the container has been logically partitioned as LP1, LP2, LP3 and so on.


The logical partitions of a container are mapped to physical partitions. These physical partitions consists of a set of replicas also called replica-set. These replica-sets hosts the cosmos DB instances. A single replica-set will have an instance of Cosmos DB.

The below picture shows how the logical partitions (LP1, LP2, LP3 and so on) of the above container C1 are mapped to different Physical partitions P1, P2 and P3. As we can see the physical partition P1 holds the two logical partitions LP1 and LP2. Same way P2 holds 3 logical partitions LP3, Lp4 and Lp5. The partition P3 holds the logical partition LP6.


These physical partitions are system controlled and we cannot manage these. But the logical partitions can be managed based on the partition key we select. Also, the efficient use of throughput provisioned on a container depends on the partition key selected. If the partition key selected fails to distribute the throughput evenly across the partitions of the container then the throughput provisioned on the container will not be used fully by the partitions. In such scenarios only a few partitions are utilized heavily and this type of partitions are called hot partitions. Each item within the partition will also have a unique itemid. The index of the item is formed by the combination of partition key and item ID.

Synthetic Partition Key:

As mentioned earlier choosing appropriate partition key plays a major role in distributing the data across partitions and in turn affects the throughput of the container. There might be situations where a particular field in a document cannot be a good partition key in such cases multiple fields can be concatenated and used as a partition key. This concept is similar to the concept of the composite index in SQL Server.

For example, in our department document example discussed at the beginning let’s say we have multiple fields like DeptID, DeptName, DeptLocation and so on. Here we can select DepID as the partition key field or we can use both DeptID and DeptLocation as the partition key.


DeptID
DepName
DepLocation
1
HR
Delhi
2
Payroll
Hyd
3
Security
Pune
4
Admin
Blr
5
Training
Chennai


If we select DeptID as partition key then partition key values would be 1,2,3,4 and so on. If we make synthetic partition key by concatenating DeptID and
DepLocation then the synthetic partition key values would be “1-Delhi”, “2-Hyd”, “3-Pune” and so on.


Also, there is another option to add a random suffix to the partition key. Like a random number can be added as a suffix to the filed selected and used as a partition key. Like if DepLocation is suffixed with random numbers then the partition key values might be like “Delhi100”, “Hyd101”, “Pune102” and so on. The other option is suffixing the partition key with a pre-calculated value. The hash value of a field is calculated and the hash value will be suffixed to the partition key field. This pre-calculated value suffixing helps in distributing the data evenly across multiple partitions and even this leads to faster reads as well. This is one of the ways hot partitions can be reduced.

Other articles on CosmosDB:


Thanks VV!!


#CosmosDB, #containers, #partitions, #partitionkey, #nosql, #cloud

Thursday, January 24, 2019

Entity Hierarchy in Cosmos DB.

In this article, we will discuss different entities of Cosmos DB and the overview about the entities. Below picture illustrates the entity order of Cosmos DB.


We need to create a Cosmos DB account under a Azure subscription. Once we have Cosmos DB account we can start creating the database under it. There can be one or more databases under one account. A database in cosmos DB is comparable to a namespace, it is a logical grouping of containers. The database helps in managing containers. Based on the type of API (Application Programming Interface) we select the type of entities in the database will differ.

Each database can have one or more containers. Containers help in managing the throughput and storage of items of a container. That is, during the creation of the container we can select the throughput and storage capacity of the container and these values can be altered after the creation of the container as required. The data entered in the container are logically partitioned automatically based on the partition key. So as the new data gets added to the container new logical partitions get created automatically. These logical partitions are mapped to physical partitions. By using snapshot isolation in cosmos DB we can update items under a particular partition.

The throughput of the container also gets partitioned across the partitions. The throughput of a container can be configured in 2 modes:

  • Dedicated: Any container having throughput set to dedicated mode, the throughput of the container is dedicated to it alone.
  • Shared: The containers for which throughput is set to Shared, the throughput is shared among other containers of the database.


Containers are Schema-Agnostic which means it is not mandatory to create schemas while using it and in case if we want to create a schema, we can create. Due to this, by default, all the items of a container are indexed automatically. We can manage indexes by using index policies of the container. 

A container can have different types of items, it can have an item representing an employee and it can have an item representing a vehicle and so on. Based on the type of API we select the items will differ. For example, we can use SQL API if we want to build a non-relational database and to query using SQL syntax, we can use Gremlin API if we want to build a graph database, if we are planning to migrate from Azure table storage to cosmos DB then we can use Table API and so on.

A unique key constraint can be created on a container through which we can enforce one or more unique values per logical partition key. This helps in preventing the duplication of values that have been specified by unique key constraint. Based on the type of API we choose the property of the container varies. We can maintain the operations log of a container by using Change feed option. Through change feed, we can maintain before/after images of items of a container.

The life span of the items of a container also can be managed by using the Time To Live (TTL) option. This option can be used to delete particular items of a container after a certain period of time or it can be used against the container itself. The items set with TTL value gets deleted from the container once the value is reached.


Thanks VV!!

#cosmosdb #Containers, #items, #Entity Hirerachy