While planning for a
migration one of the important steps is to study and understand our existing
source environment. We need to first understand whether our existing source
environment is ready for migration or not, what issues we might face if we
migrate, what dependencies we have between our servers and SQL
instances\databases, what users permissions exist and so on. A careful study of
our source environment helps in avoiding issues during migrations and even
prevents issues that might occur after migration.
We
already studied about DMA tool, this tool helps greatly in verifying and
assessing the source databases and it will give us a detailed report of whether
source databases are ready for migration or we need to fix any issues before
migrating and so on. But we should remember DMA is not a tool for information
collection.
Many
clients manage inventory of the environments. For the people who are unaware of
inventory, it is the collection of all the details of the environment like
applications, servers, Hardware and Software details, database instances,
database details, storage, and so on. Having an inventory helps in planning any
migration activity smoothly because we will be well aware of our environment
and we can plan the migration accordingly. This is true for any kind of
migration not only cloud migrations. It is a time-consuming process to collect
the information manually and consolidate it. Instead of collecting or fetching
the information manually, we can use a tool called MAP Toolkit.
What is MAP Toolkit?
Microsoft
Assessment and Planning Toolkit (MAP Toolkit) is a free Microsoft tool that can
be used to collect, assess, and display the information gathered in report
format automatically about our environment. This tool saves tons of time by
fetching the information of all the servers in our environment automatically.
We can use this tool to capture the performance metrics as well.
How to download MAP
Toolkit?
It
can be downloaded from here.
How to install Map
Toolkit?
After
downloading the exe from the above location, installing the application is
quite straightforward and easy. Just double-clicking and clicking Next.
How to use MAP
Toolkit?
After
installing the tool click on the icon below:
Now
once the tool will open the first step we need to perform is to give a name to
our inventory database

Here
I’m naming my database as “DB Inventory”

After
naming the database, on the left side of the tool we can see different types of
information we can fetch using the tool.

As
mentioned earlier this tool is useful in fetching information about the entire
environment but in this article, we will see how we can fetch information about
SQL Server instances and databases within. So lets select ‘Database’ option
from the left side of the tool

Next
Click on the ‘collect inventory data’ option on the right side (highlighted in
below screenshot) of the tool

Now
the ‘Inventory and Assessment Wizard’ will open. Here we can select what different
types of inventories we can collect.

As we want to collect information specific
to SQL Server, scroll down the list and select SQL Server and SQL Server with
Database Details from the list.

Based
on the scenarios we select above, the tool determines which different
technologies should be used to collect different information. In the next
window, we can select the ‘Discovery Methods’ like whether to use Active
Directory, Windows networking protocols, and so on. As I’m running this on my
local machine I will select the ‘Manually enter computer names and credentials’
option.

As we
are aware we need some credentials to access servers, in the next windows we
need to provide that credential information with which the tool can communicate
with the servers in the network. We can choose different credentials for
different technologies and if required we can validate the credentials using
Domain controller.

Here
I want to only one credential for all the technologies, so I’m mentioning as
below

When
we have multiple credentials in-place then in the next window we can prioritize
the credentials for each technology like in which sequence credentials need to
be used for each technology

In
the next window, we need to specify the computer details for which we want to
fetch the information and along with that, we can provide the credential to use.

Once
we click on ‘create’, we can add the computer names and which credentials to
use for the technologies. Here I’m using the same credentials.


Now
in the summary window, we can see all the options we selected. Cross check and
modify if any required.

After
clicking on ‘Finish’ the tool will start collecting the requested information
from the servers. We can see in the ‘Data Collection’ window which pops-up
automatically.

Once
data collection is completed, click on close

Now
once we go back to MAP Toolkit we can see the tool has identified 2 instances
of SQL Server in my machine and their version is SQL Server 2017. Click on
‘Total count’.

Now
we can see more information about SQL Server components in my machine. Like
what all SQL Server components have been detected in machine


What
editions are available

Now
scroll up and on right side top corner we can see two reports available as shown
in the picture below

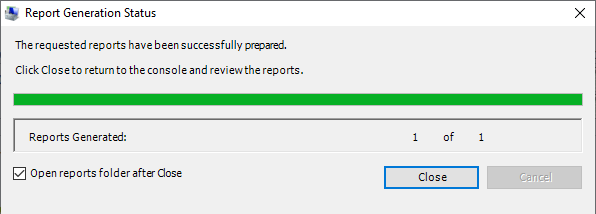
Once
we click on the required report, a report will be generated and saved as shown
below
Once
we open the report we can see entire information about the SQL Server
environment. These reports will have detailed information about the SQL instances like components of SQL, their configuration, settings, database details, user details and much more. Below are a few sample screenshots.


Similarly,
we can use this tool in collecting information about our entire environment
during the planning phase of the migration.
Thanks
VV!!
